Tuesday 19 June 2018

CRUD Operations in MVC using Entity Framework, JQuery AJAX Part-2

Before getting started with this tutorial if you guys are not aware what are CRUD operations and how to perform them without using JQuery, Entity Framework (database) then please read this article first CRUD Operations in MVC Part-1

Prerequisites
  • Visual Studio 2012 or higher
  • MS SQL Server 2012 or higher 

Setting up Environment 
  • Open Visual Studio (any version from 2012 onward), I'm working with Visual Studio Professional 2017.
  • Create new project, select C#, select Web, select ASP.net Web Application Name your project then press "OK"
  • Select MVC, change Authentication to "No Authentication" press OK and then OK
The above steps will create a ready-made MVC application for you with all of your basic needs including Bootstrap, Jquery, basic layout of website, a single controller and its related views. All you need now is to start coding

Setting up Database

I'm going to follow Database First Approach for using Entity Framework, in my opinion this approach is somewhat flexible for you to learn it at first instance.
  • Open SQL Server and Create new Database, name it "Test" database
  • Create a new table within newly created database naming "Employee" with the fields of Id, Name and Email and save the table
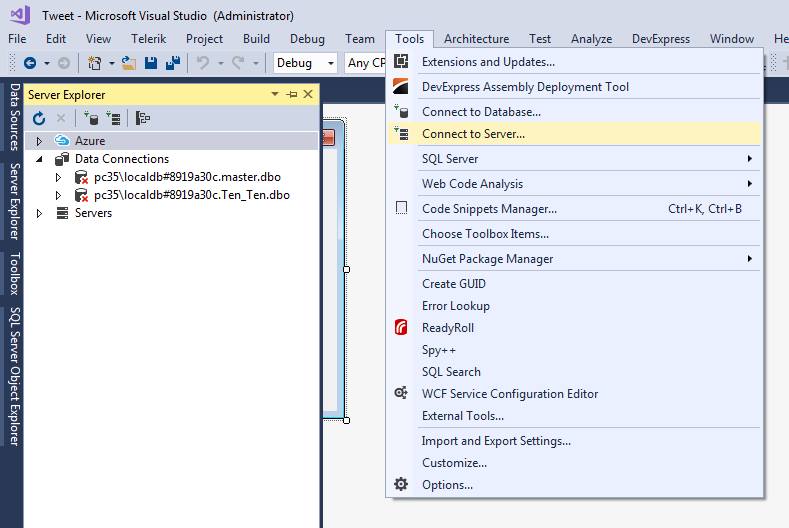
  • Open Visual Studio, go to Server Explorer
  • Right-click on Data Connections, click Add Connection
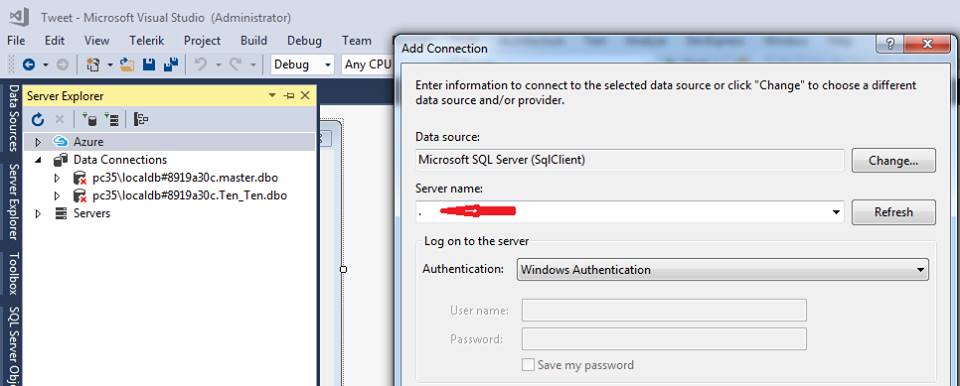
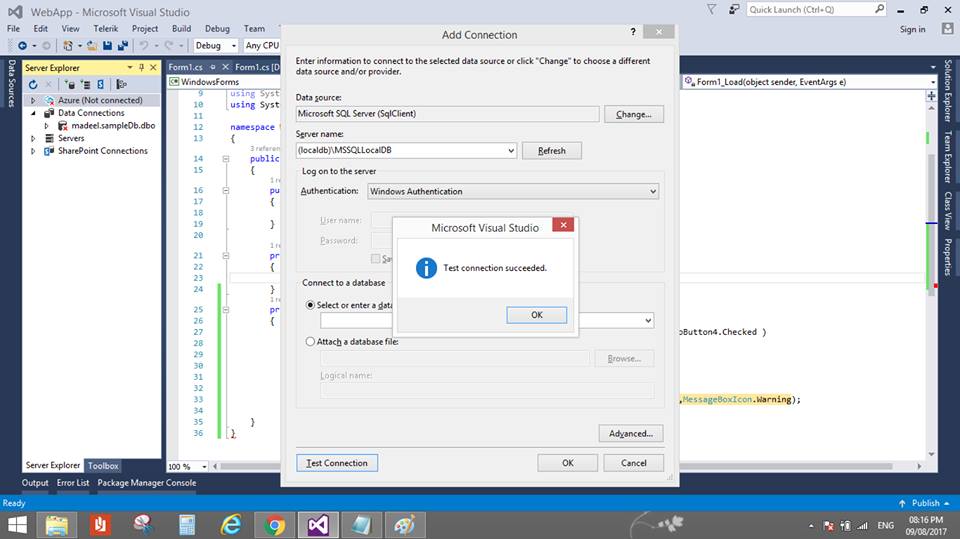
  • Put dot '.' in place of Server name and then select newly created database
  • Click on Test Connection Button, see image below

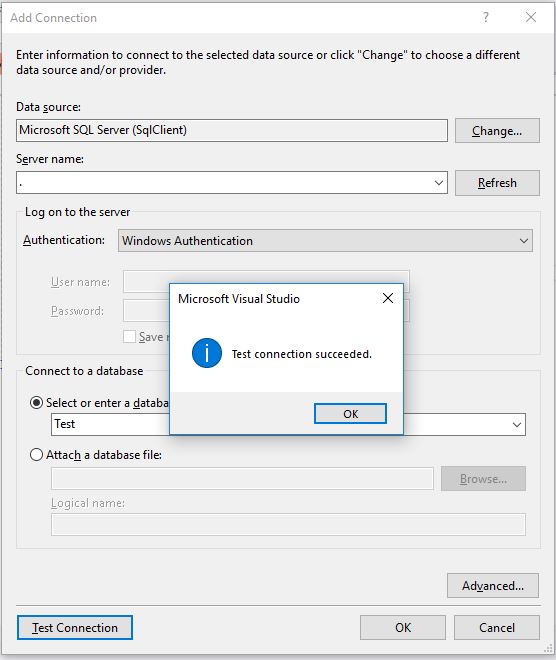
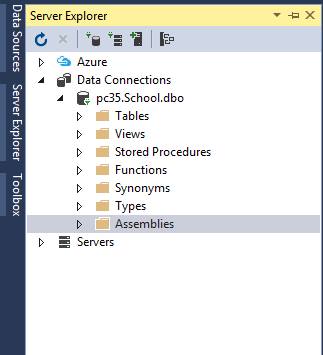
Congratulations! You are now connected with the database.
The next step is to create Entity Data Model
  • Right-click on models, select "add new item"
  • Click on Data in the left-pane
  • Select ADO.NET Entity Data Model
  • Give it appropriate name and click on Add button


A new dialog-box will appear, do the followings:
  • Select EF Designer from Database Press Next
  • The next dialog-box will ask to choose data connection, if you don't have existing connection then do nothing and press Next button
  • Then choose version, I'm working with 6.x, if your project doesn't have one, install it using Nuget Package Manager, press Next button
  • The next dialog-box is about database Objects and Settings check Tables box, rename Model Namespace if you require and press Finish button

Now wait for few seconds and let the Visual Studio do its heavy tasks, after that Entity Data Model Diagram page will open just like the image below


Now we are ready to go with Entity Framework. Notice your web.config file, a connection string will be automatically added there.


Insert some dummy records into Employee Table from Sql Server using the below query

insert into Employee values('James','james1@gmail.com'),('Lisa','lisa1@gmail.com'),
('lazy','lazy_entity@gmail.com'),('Anna','annna@gmail.com'),('Andrew','and1@gmail.com'),
('entity','someEntity@gmail.com'),('Smith','smith@gmail.com'),('Jakob','jakob@gmail.com')

Now change your Index method within HomeController.cs with the below code

TestEntities te = new TestEntities();  
public ActionResult Index()
{
    return View(te.Employees.ToList());
}


TestEntities is the name of the connection string I've set for my Entity Model
Now change your Index.cshtml code with the below code

@model IEnumerable<Blog.Models.Employee>
@{
    ViewBag.Title = "Home Page";
}
 
<h3>Employees</h3>
@Html.ActionLink("Create new Employee", "Create_New")
<div class="row">
    <div class="col-md-5">
        <table class="table table-hover">
            <tr>
                <td><b>First Name</b></td>
                <td><b>Last Name</b></td>
                <td><b>Ops</b></td>
            </tr>
            @foreach (var item in Model)
            {
                <tr>
                    <td>@item.Name</td>
                    <td>@item.Email</td>
                    <td>
                        @Html.ActionLink("Edit", "Edit", new {Id = item.ID}) |
                        @Html.ActionLink("Delete", "Delete", new { Id = item.ID })
                    </td>
                </tr>
            }
        </table>
    </div>
</div>

Now press Ctrl+F5 or simple F5 to run the project, it will get you to the default page of our project which is Index page and the output of that page would be this:


We've completed the R part of CRUD operations using Entity Framework, lets move to other parts now.

Create part of CRUD Operations:

Notice the below line of code in our Index.cshtml, this code means display text "Create new Employee" within browser and when the user clicks this text, call the method Create_New( ) within HomeController.cs that we have not defined yet. 


@Html.ActionLink("Create new Employee", "Create_New")


Create a method named Create_New within HomeController.cs like mentioned below:


[HttpGet]
public ActionResult Create_New()
{
    return View();
}
[HttpPost]
public ActionResult Create_New(Employee emp)
{
    te.Employees.Add(emp);
    te.SaveChanges();
    return View("Index", te.Employees.ToList());
}

The methods are decorated with HttpGet and HttpPost, these are for identification because method names are same, when a user views a page its a HttpGet call and when the user submits some data it is HttpPost call. Right-click on Create_New( ) method and create a new view just like the image below


It will automatically create a Create_New.cshtml within Home Folder within Views, give names carefully.

Now run the project and click on Create_New link on Index page, the following page will be displayed


C part of out CRUD Operations are completed using Entity Framework.


Update, Delete part of CRUD Operations:


Notice the below line of code in our Index.cshtml, this code means display text "Create new Employee" within browser and when the user clicks this text, call the method Create_New( ) within HomeController.cs that we have not defined yet. 

@Html.ActionLink("Edit", "Edit", new {Id = item.ID}) |
@Html.ActionLink("Delete", "Delete", new { Id = item.ID })


The above two lines of code calling Edit method within HomeController.cs and Delete Method of HomeController.cs but we've not defined both the methods yet, lets start with Edit. Creating both these methods are same just we do with Create_New() method


public ActionResult Edit(int ID)
{
    var employee = te.Employees.SingleOrDefault(x => x.ID == ID);
    return View(employee);
}
[HttpPost]
public ActionResult Edit(Employee emp)
{
    var employee = te.Employees.SingleOrDefault(x => x.ID == emp.ID);
    if (employee != null)
    {
        //Update the existing employee data
        employee.Name = emp.Name;
        employee.Email = emp.Email;
    }
    te.SaveChanges();
    return View("Index", te.Employees.ToList());
}

Explanation: The first method is not decorated with any attribute like HttpGet, if we don't do that, Visual Studio considers that method as HttpGet by default. It takes an ID which we are passing from Index page if you notice the link for edit there is also ID attribute defined. Applying SingleOrDefault which gets single record based on ID from database and sends it to the Edit.cshtml for Viewing that specific record

The second Edit with HttpPost means client is posting data with some changes to the server, we are simply updating that specific instance of employee within our database and calling savechanges() which means any pending changes tracked by Entity Framework are requested to be committed and finally calling the Index ActionMethod of HomeController.cs to display all the list


Delete:
The below code will make the link delete work properly, it will permanently delete the record from the database

public ActionResult Delete(int ID)
{
    var employee = te.Employees.SingleOrDefault(x => x.ID == ID);
    te.Employees.Remove(employee);
    te.SaveChanges();
    return View("Index", te.Employees.ToList());
}


JQuery AJAX: All the calls to the server-side methods were made by using the default behavior of set by the Microsoft in their templates which isn't a standard practice. So, we'll replace our existing calls with JQuery calls. For this purpose you need to verify whether the JQuery is installed within your project by just going to the script folder within your project, we'll just work with Index method which we used to display the list of employees.


Replace your Index.cshtml code with the below code

@model IEnumerable<Blog.Models.Employee>
@{
    ViewBag.Title = "Home Page";
    Layout = "~/Views/Shared/_Layout.cshtml";
}
 
<h3 id="hideEmployee">Employees</h3>
<div class="row" id="changeDivUsingAJAX">
    <div class="col-md-8">
        <span onclick="AjaxCall()">Create new Employee</span>
    </div>
        <div class="col-md-5">
        <table class="table table-hover">
            <tr>
                <td><b>First Name</b></td>
                <td><b>Last Name</b></td>
                <td><b>Ops</b></td>
            </tr>
            @foreach (var item in Model)
            {
                <tr>
                    <td>@item.Name</td>
                    <td>@item.Email</td>
                    <td>
                        @Html.ActionLink("Edit", "Edit", new {Id = item.ID}) |
                        @Html.ActionLink("Delete", "Delete", new { Id = item.ID })
                    </td>
                </tr>
            }
        </table>
    </div>
</div>
 
<script type="text/javascript">
    function AjaxCall() {
        $('#hideEmployee').hide();
        $.ajax({
            type: "GET",
            url: "/Home/Create_New",
            success: function (response) {
                debugger;
                $('#changeDivUsingAJAX').html(response);
            },
        });
    }
</script>

Note: If you are using MVC-5 then you need to go to _Layout within Shared folder within Views and move  

@Scripts.Render("~/bundles/jquery")

from end of Body section into the end of head tag of your html then the Jquery will work, it was a problem with default Jquery bundling in MVC.

That's it for now, Try making rest of the calls using JQuery AJAX, if you face any problems please leave comment below, I hope you guys enjoyed this detailed tutorial. 

Provide your valuable feedback about how I'm going, it will be helpful for me in creating tutorial in more useful manners.

Stay Blessed!

CRUD Operations in MVC Part-1

In this tutorial we'll learn how to perform simple CRUD operations in MVC. This is the first part which will deal with a student model without database involvement. The second part of this tutorial will involve Entity Framework database with same operations and JQuery AJAX.

Read of CRUD

Step 1) Create new project in Visual Studio, select Visual C#, Select Web and then select ASP.NET Web Application, Name your project and then press OK button.


Step 2) Select MVC, change Authentication to "No Authentication" press OK and then OK


Step 3) Right click on your models, select add and then click class. A dialog will appear name the class i.e. "Student" and press Add


Structure of Student Class

public class Student
{
    public int Id { get; set; }
    public string First_Name { get; set; }
    public string Last_Name { get; set; }
    public DateTime Date_of_Birth { get; set; }
}

Structure of Project
Make sure you have all the folders and files within the folder which are highlighted with yellow color, all the folders are by-default added when we created the project, we have only added 1 student class nothing else. See the attached image.


Step 4) Open the HomeController.cs file, design your default page first, its called Index method within your HomeController.cs

List<Student> students = new List<Student>
{
    new Student{Id=1,First_Name = "John",Last_Name="Wick",Date_of_Birth= new DateTime(1988,6,12)},
    new Student{Id=2,First_Name = "Lisa",Last_Name="Joseph",Date_of_Birth= new DateTime(1989,5,21)},
    new Student{Id=3,First_Name = "Aman",Last_Name="Kaur",Date_of_Birth= new DateTime(1990,8,11)},
    new Student{Id=4,First_Name = "Ashish",Last_Name="Nehra",Date_of_Birth= new DateTime(1991,12,9)},
    new Student{Id=5,First_Name = "Kabeer",Last_Name="Khan",Date_of_Birth= new DateTime(1985,3,13)},
    new Student{Id=6,First_Name = "Satya",Last_Name="Narayan",Date_of_Birth= new DateTime(1990,6,5)},
    new Student{Id=7,First_Name = "Forman",Last_Name="Trump",Date_of_Birth= new DateTime(1998,01,6)},
    new Student{Id=8,First_Name = "Murad",Last_Name="Saeed",Date_of_Birth= new DateTime(1986,9,16)},
    new Student{Id=9,First_Name = "David",Last_Name="Rahul",Date_of_Birth= new DateTime(1999,05,26)},
    new Student{Id=10,First_Name = "Kinnerd",Last_Name="James",Date_of_Birth= new DateTime(1980,07,16)},
 
};
public ActionResult Index()
{
    //Pass List of Students to Index view page
    return View(students);
}

You'll have to add the reference to your student class within Controller code like this

using Blog.Models;

Step 5) Change your Index View page, go to your views, select Home, open file Index.cshtml and change the code with the below code

@model IEnumerable<Blog.Models.Student>
@{
    ViewBag.Title = "Home Page";
}
 
<h3>Students</h3>
<div class="row">
    <div class="col-md-4">
        <table class="table table-hover">
            <tr>
                <td><b>First Name</b></td>
                <td><b>Last Name</b></td>
                <td><b>Date of Birth</b></td>
            </tr>
            @foreach (var item in Model)
            {
                <tr>
                    <td>@item.First_Name</td>
                    <td>@item.Last_Name</td>
                    <td>@item.Date_of_Birth.ToString("dd/MM/yyyy")</td>
                </tr>
            }
        </table>
    </div>
</div>

Now run the project it will display the Index page like this:


Create of CRUD
Step 1) Create a new method within HomeController.cs like below

public ActionResult Create_New()
{
    return View();
}

Step 2) Right click on your Create_New( ) and create a new View like image below


ViewName; must be the same as your method name within your controller
Template: must be create, because we are creating a new record
Model Class: must be the Student class 
Now click on Add

Step 3) Add Create_New( ) Post method which will get the Student model from the view we've just created, don't forget to decorate other Create_New( ) method with [HttpGet]

[HttpPost]
public ActionResult Create_New(Student std)
{
    std.Id = students.Count() + 1;
    students.Add(std);
    return View("Index",students);
}

Step 4) Change your Index.cshtml and add link to the Create_New page like below

@model IEnumerable<Blog.Models.Student>
@{
    ViewBag.Title = "Home Page";
}
 
<h3>Students</h3>
@Html.ActionLink("Create new Student", "Create_New")
<div class="row">
    <div class="col-md-4">
        <table class="table table-hover">
            <tr>
                <td><b>First Name</b></td>
                <td><b>Last Name</b></td>
                <td><b>Date of Birth</b></td>
            </tr>
            @foreach (var item in Model)
            {
                <tr>
                    <td>@item.First_Name</td>
                    <td>@item.Last_Name</td>
                    <td>@item.Date_of_Birth.ToString("dd/MM/yyyy")</td>
                </tr>
            }
        </table>
    </div>
</div>

Step 5) Change your HomeController method Index with the below code

public ActionResult Index(List<Student> studentsList = null)
{
    if (studentsList == null)
        return View(students);
    else
        return View(studentsList);
}

Explanation: studentsList is the list we're passing from our Change_New( ) method, that is by-default set to null. Conditions check if passed is nothing or null then default list is displayed otherwise it will show the updated list of students, the above changes will change the Index page, create new page


Update of CRUD
Step 1) Create a new method within HomeController.cs like below

[HttpGet]
public ActionResult Edit(int Id)
{
    return View(students.Single(x => x.Id == Id));
}


Explanation: The above method gets the Id of the students and search it within list of students and return the desired record to Edit page


Step 2) Create a new view by right clicking on the Edit method just like we did in create method within HomeController.cs like below


Step 3) Copy and paste below method

[HttpPost]
public ActionResult Edit(Student std)
{
    var student = students.Single(x => x.Id == std.Id);
    student.First_Name = std.First_Name;
    student.Last_Name = std.Last_Name;
    student.Date_of_Birth = std.Date_of_Birth;
    return View("Index", students);
}

Explanation: The above method will get the student record and will update that instance within the list of students. Edit view page will also be same as the create new page, it will show the details of the student

Delete of CRUD
Step 1) Create a new method within HomeController.cs like below

public ActionResult Delete(int Id)
{
    var student = students.SingleOrDefault(x => x.Id == Id);
    if(student!=null)
        students.Remove(student);
    return View("Index", students);
}

That's it. The purpose of this tutorial was to provide you with basic understanding of how you can do basic operations in mvc using default template of MVC provided by Visual Studio.

Note: The above code doesn't work for multiple records i.e. edit, delete its because we are using in memory List not a database, the next tutorial will cover that issue, so you'll be able to permanently edit, delete, add new records effectively.

Monday 18 June 2018

Calling stored procedure from Winform app in c#

The image below shows of how you can call a Stored Procedure from your application, its so simple and easy. You just need to put the name of your stored procedure instead of a query and define the type of your query, that's it.

First image is the structure of the Stored Procedure and the second is the WinForm code for executing the Stored Procedure. Dummy is the table name within Database


Connect to SQL Server database in c#

This tutorial will help you on how you can connect to the SQL Server database using visual studio windowsForms. You can follow this tutorial for webforms or asp.net too( little modifications within web.config). Follow these steps to get connected with the SQL Server.
1) Create a database(If not exists) within sql server by connecting it with your account localhost or whatever your server name is.
2) Goto visual studio clicks on the tools->Connect to Databases
3) A dialog box will appear, in the server name just write '.'(dot) which states that you are going to connect with the databases within your local account.
4) Click on the select or enter database drop down, there will appear all the databases that your account holds.
5)
Select database, the one you wanted to connect to.
6) Click server explorer within your visual studio, A connection would be automatically created there, write click on the db, copy the connection string from there and use that connection string within your application.
I've attached all the images with step number.
If you don't understand anything within sql server/visual studio/c#/desktop/web, please make a post here, I'll try my best to help you.


Connect to localDB database using WinForms in C#

This is simple tutorial of how to connect with localDB DB, I've made this tutorial because I've seen a lot of people facing issues while connecting with databases. First part of this tutorial is about localDB connectivity using ADO.NET, you can also use any ORM for this purpose like EF, NHibernate etc. I'm doing this in a traditional way.
Lets jump into the code, first create any application i.e. windows form, wpf, asp.net (webform or mvc), I've used WinForm for this purpose. Verify whether localDB is installed or not by going into control panel, add remove programs.
Follow the given
steps for connectivitiy:
1) Create new application
2) goto Tools->Connect to database
3) Enter the instance name i.e. (localdb)\V11.0 and click on test connection or drop down with label "Select or enter database name"
4) If there comes an error like "A network related instance..."
go back to step 2 and enter the instance name (localdb)\MSSQLLocalDB again click on test connection or drop down of selecting database
5) It will successfully connect to the database
6) The connection with the database has been established, it will be showing in your Server Explorer
7) Right click on your database within Server Explorer
8) Goto->Properties, there will be a dialog box with information about the DB, you can get Connection string from there and use it within your application for the db connectivity, I've attached the images, Have a look.
Hope it helps the people who faces difficulty in this step with localDb. Next part will contain the connectivity with SqlServer Database.


Images are attached for better understanding:


Create and run c# code dynamically

Developing and running c# code dynamically is not that hard by using Roslyn Scripting API, you can write any type of c# code i.e. you can write a class within a string and can run it with Roslyn very easily. The below sample will help you in understanding what I mean actually.

await CSharpScript.EvaluateAsync("System.Math.Round(1.5)");

Output of the above code is:

2

You can also create classes, define their methods to perform any functionality and can use it like the above mentioned way very easily. All you need to do if to add a reference to Roslyn Scripting API which is provided in the above link and that's it.

Windows Forms Controls Visibility in c#

Sometimes we need to change the visibility of the WinForm controls. There could be the cases where we want to show/hide the controls for appropriate actions, people based on the requirements of the applications or the functionality. You can do it very easily just by creating a property of that particular controls and change its visibility like mentioned below


public bool IsControlVisible
{
  get { return control.Visible; }
  set { control.Visible = value; }
}

Usage: You can use the above code to determine/set the current visibility status of the control by using the below code

if(!MyForm.IsControlVisible)
{
  MyForm.IsControlVisible = true;
}

Explanation: MyForm is the instance of the winform and control is any control on that form, the if condition checks if the control is not visible then setting its visibility to true which will make the controls visible on the form. You can use the above property with any type of controls within the WinForm.